Wednesday, June 25, 2014

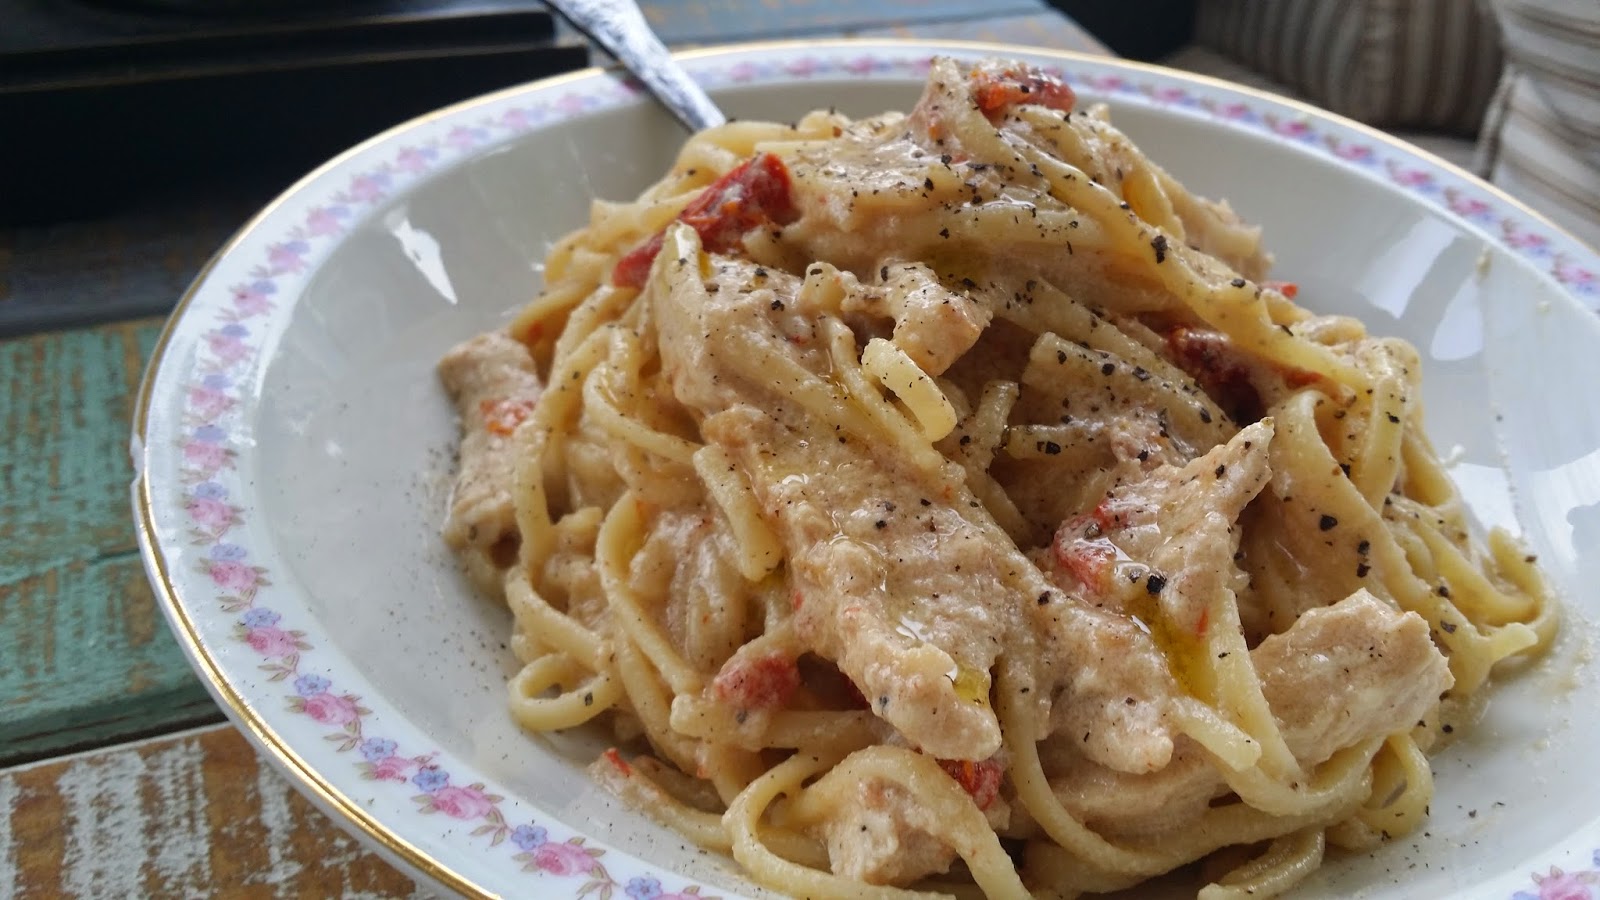
Fettuccine Alfredo with Sun Dried Tomatoes and Chicken


Oh, boy. It is starting to heat up in New England and my dear boyfriend has been working hard outside. In order to surprise him for being such a good worker, I thought I would make him one of his favorite dishes, Fettuccine Alfredo with Chicken! However, in my attempt to make it a smidgen more healthy, I didn't use any cream, and I added some flavorful sun dried tomatoes. This is the type of meal that is a definite treat. It is incredibly decadent, creamy, and perfect for an "every once in while" occasion. 

Ingredients:
3 Chicken breasts, trimmed of all the fat
1 lb. fettuccine or fettuccine fini pasta 
1 T olive oil
4 T butter, divided
2 T flour
3 1/4 C. whole milk
1/4 C. grated Parmesan cheese
1/2 C. sun dried tomatoes (any variety EXCEPT smoked) cut into small strips   
3/4 C. Mascarpone cheese
Salt, Pepper, Garlic powder, hot pepper flakes

Instructions:
1) Cook a package of fettuccine pasta to al dente, according to box directions. Next, in a large, heavy bottomed skillet, add olive oil and 1T. of the butter on medium/low heat. 
2) Season chicken breasts with salt, pepper, and garlic powder. Place in skillet and brown on both sides. Approximately 3 minutes per side, or until they look like this:
 3) Place the browned chicken on a plate and cover with foil. Drain any remaining oil in pan, then return pan to heat. 
4) Add remaining butter to pan and stir until it melts, then add the flour and stir for about 1 minutes. 
5) Add milk to pan, and scrape the bottom of the pan to loosen up all the leftover flavor from the chicken. 
6) Add at least 1/2 t. of salt, pepper, and garlic powder while the sauce slightly thickens. Taste the sauce as it cooks, if it tastes bland, it's because it needs more salt. Add a pinch of hot pepper flakes for heat. Cook sauce for about 5 minutes. 
7) Stir Parmesan cheese and sun dried tomatoes into the sauce.Add Mascarpone cheese, and stir until dissolved. Check one more time for seasoning. Slice up chicken breasts and stir into the sauce for 1-2 more minutes until  cooked through. 
8) Add pasta into the sauce, and continue to cook on medium-low heat until pasta is coated in sauce, and the sauce is desired thickness. 

Enjoy! Serves at least 5 hungry people!


Saturday, June 21, 2014

Classic Banana Bread


Hello, all! Today I have a very special recipe to share. This was my Grandmother's banana bread recipe that I grew up eating at almost every family function throughout the years. Whenever I make banana bread, it reminds me of my Grandmother, and how great of a cook and baker she was! I hope to one day be as great of a person as she was.
This banana bread recipe is simple with no frills. No cinnamon, nutmeg, five-spice, or any embellishments that people cram into desserts these days. This recipe is really meant to showcase the star ingredient; banana. By keeping the pungent spices to a minimum, the bread really shines like an old, classic recipe.
When making banana bread, PLEASE REMEMBER to ALWAYS use incredibly overripe, brown or black bananas. I recall watching an episode of "Cupcake Wars", in which experienced bakers with their own storefront were making a banana cupcake, and used just barely ripe bananas. I was honestly taken aback over the fact that these professionals didn't mention, or seem to understand that when making banana-flavored/based desserts, you will get 10x the flavor if the banana is almost completely brown. As long as your bananas aren't moldy or rotten, they are safe to use.

Ingredients:
1 stick soft salted butter (or unsalted butter + 1/2 t. salt)
1 C. white sugar
2 eggs
3 very ripe bananas, mashed
1 t. vanilla extract
1 1/2 C. AP flour
1 t. baking soda

Instructions:
1) Preheat oven to 350 F.  In a large bowl or standing mixer, beat together butter, sugar, eggs, and vanilla until combined.
2) In separate bowl, mix baking soda into flour.
3) Mix the dry ingredients into the wet ingredients with a spatula just until combined.
4) Pour batter into greased loaf pan, and bake for approximately 50 minutes, or until a toothpick comes out clean after inserting.  If the top is getting too dark for your liking, just cover with tin foil.


Friday, June 13, 2014

Shrimp and Fennel Salad with Citrus Dijon Vinaigrette


Hello, all! Although we are halfway through June, Connecticut is clinging on to cool temperatures with all its might! We have had about five 80° days so far, and the rest of the time it has been fairly cool. But the summer recipes must go on! Salads are a great option for summer dinners and lunches, because the meat can be grilled outside, and the rest assembled in the kitchen without turning on the oven or stove and heating the whole house up. Although it isn't too hot outside yet in New England, my kitchen is already starting to get uncomfortably warm when I cook indoors, so a salad recipe is in order. 
Fennel is often found in Italian recipes, and it pairs wonderfully with seafood. It has a texture similar to a firm raw onion, but it tastes nothing like an onion. It has a mild licorice taste, much like a fennel seed. If you have never tried it, you should! It can be eaten raw, but make sure to slice it as thinly as you can manage, so it can really soak up the vinaigrette. Fennel is also wonderful when cooked in a fish stew or soup. I have a fabulous Cioppino recipe that I will share this summer that utilizes cooked fennel. But for now, give this wonderful summer salad a try, and keep cool!

Ingredients:
1-2 heads of lettuce ( I used red leaf lettuce. You could use romaine, mixed greens, or any kind you like)

1 bulb fennel, thick outer layer removed. Sliced thinly
1 red onion, thinly sliced
1 lb. raw shrimp (peeled and de-veined, and patted dry with paper towel) 
1 large naval orange, zested and juiced
1 T. lemon juice
2 T. red wine vinegar
4 T. extra virgin olive oil
1/2 T. dijon mustard
Salt and Pepper to taste

Instructions:
1) For the vinaigrette: whisk together lemon juice, orange juice, red wine vinegar, dijon mustard, and a pinch of cracked black pepper and salt. Once combined, slowly drizzle in oil while whisking constantly until emulsified. 
2) In a large bowl, combine shrimp, 1 T. of vinaigrette and zest of the orange. Let sit while grill heats up. 
3) Grill shrimp for 1-2 minutes per side, or until the pink and curled up. 
4) Mix thinly sliced onion, fennel, and torn lettuce with  vinaigrette. Top with Grilled shrimp. 

 As you can see, I grilled my shrimp in a grill basket, because my grill can be inconsistent and flare up for no good reason. You do not need a grill basket for this recipe to come out tasty!


Tuesday, June 3, 2014

Italian Roasted Vegetable Sandwich


Anyone else out there in love with roasted vegetables? Roasting vegetables renders a slightly sweet, caramelized flavor that cannot be replicated in any other way (in my opinion). If you are the type of person that doesn't particularly enjoy vegetables, I strongly suggest you try roasting them. All you really need is olive oil, salt, and pepper to make a wonderful dish of veggies. 
 Today, I wanted to make a healthy meatless meal that even my carnivorous boyfriend and father would enjoy! I was surprised that a simple roasted vegetable sandwich would go over so well! I got several compliments on the meal, and zero complaints! I'd say that's a good meal! Feel free to mix up the vegetables and roast whatever you have on hand!

Ingredients:
1 large white or yellow onion
1 head of garlic, cloves separated but still in their skins
2 eggplants
2 red, orange, or yellow bell peppers
about 1/4 cup of olive oil
1 t. salt
1/2 t. pepper
4 Ciabatta rolls or any type of sandwich roll
Slices of tomato 
mayo (to taste)
Sliced cheese of your choice (I used a mild cheddar)

Instructions:
1) Preheat oven to 375. 
2) Chop all veggies into relatively equal size chunks.  Between 1"-2" is fine. 
3) Mix raw veggies and garlic cloves (still in their papery skins) with olive oil, salt, and pepper. Make sure everything is evenly coated. 
4) Arrange veggies in a single layer on a baking sheet or baking pan. Bake for about 1 hour, flipping veggies half way through cooking time. All veggies should be fully cooked and tender.
5) Carefully pop the flesh of the roasted garlic out of its papery skin. Smear the roasted garlic onto the ciabatta roll. Place cheese over roasted garlic smear. 
6) Stick the rolls under the broiler until the cheese is bubbling and roll is toasted.
7) Spread mayo onto the bread, and arrange tomatoes and roasted veggies onto bun. 


Friday, May 30, 2014

Lemon Madeleine's


There is something so charming about French Butter Cakes, or Madeleine's. These miniature seashell cakes are a classic treat that can be found in many grocery stores. Although I have tried the prepackaged Madeleine's, I much prefer to make them myself. They are easy to make and require simple ingredients that most people keep on hand in their kitchen or pantry. These cakes turned out  scrumptious. Their texture was light yet substantial. They were moist, lemony, flavorful, and divine. I brushed on a bit of lemon simple syrup when I took them out of the oven to get another hit of lemon flavor. This step is optional, because they are wonderful with a simple dusting of powdered sugar and a cup of coffee.

Ingredients:
2 eggs
1/2 t. vanilla extract
Entire zest of large lemon
1/4 C. melted salted butter
1/2 C.  AP flour
1/8 t. baking powder
1/4 C. granulated sugar
1 1/2 T. honey

about 1/2 cup powdered sugar for garnish

Optional: Simple syrup Ingredients: 1/4 C. water, 1/4 C. sugar, about 1 T. lemon juice

Instructions:
1) Preheat oven to 375. Grease the Madeleine mold.  Melt butter (either in microwave, on stove top, or in oven) until liquefied. Set aside and let cool. 
2) In a large bowl, whisk together eggs, lemon zest, and vanilla until light and frothy. (This should only take about 2 minutes if you whisk vigorously). 
3) Add sugar and honey and whisk vigorously until the batter is thick. This should take about 5 full minutes. Be patient. 
4) Gently mix in flour and baking powder until combined. 
5) Fold in cooled, melted butter until incorporated. 
6) Spoon batter into greased Madeleine molds ( filling each mold about 3/4 of the way). 
7) Bake for about 8 minutes, rotating the pan halfway through baking. They will be done when a toothpick comes out clean, and some edges are golden brown. 
8) When cooled, dust with powdered sugar. 

Optional: 
If you would like to get an extra hit of lemon flavor, prepare the simple syrup by putting water, sugar and lemon juice into a saucepan and heat until sugar is dissolved. As soon as the mixture simmers, take off the heat and brush onto the surface of the Madeleine's.  After the syrup has soaked in, garnish with powdered sugar. 


Saturday, May 24, 2014

Potato Bacon Swiss Tart


Sometimes I daydream about scrumptious food combinations that I have yet to try. Throughout the course of the day, I very well may think of a dozen flavor combinations, and forget half of them. This is due mostly to the fact that I don't write them down, (shame on me)! However, yesterday I thought of a delicious combination, and I didn't forget it. Bacon and cheddar has been a famous pairing for decades. I wanted to make a tart using bacon and dijon mustard, but the tart would hardly be substantial with just two ingredients. I thought about topping with it with a lightly dressed frisée salad and poached eggs. This would be a take on the classic French Lyonnaise salad, (to be in an upcoming blog). However, I didn't have any frisée, and it would be a 30 minute trip to the nearest Whole Food's to find it. So, I improvised. I had a few medium red potatoes and swiss cheese, and made a fantastic dinner. This savory tart is sure to please and easy to make!

I took a short cut and used pre-made frozen pie dough that I had on hand. You could also use a store bought puff pastry as the crust of this tart, but when you par-bake it, you must put a layer of tin foil over the pastry and fill the mold with dried beans to keep the pastry from rising too much. The dried beans can not be eaten after using them to par bake, but you can certainly keep them around for future use if you need to weigh down puff pastry!

Ingredients:
1 frozen roll of pie dough (or one sheet of frozen puff pastry- just remember the note above)
2 Tb. dijon mustard
7 ounces very thick cut bacon, cut into 1/2 inch pieces
3-4 medium red potatoes, sliced into 1/4" slices
1/4 teas. Herb De Provence ( or a pinch each of rosemary and thyme)
Pinch salt
Pinch cracked black pepper 
9-10 ounces of swiss cheese
Drizzle of olive oil 

Instructions:

1) Roll the dough over your tart pan, and form into fit in the pan and come up the sides. Patch any holes. Prick the surface with a fork, and par-bake at 400 degrees for about 5 minutes, or until the sides get a lightly golden brown.
2) When you pull the tart out of the oven, let cool, then brush the dijon mustard over the surface. 
3) Fry the bacon in a nonstick skillet until slightly crispy, but still chewy. About 10 minutes over medium-low heat. 
4) In remaining bacon fat, fry sliced potatoes and Herb De Provence. About 10 minutes over medium low heat, until fully cooked, but not falling apart. 
5) Scatter bacon over the dijon mustard.
6) Place swiss cheese in an even layer over the bacon. 
7) Top the tart with potatoes, cracked black pepper, and a drizzle of olive oil.
8) Place back in the oven and bake until the cheese is melted and potatoes are slightly golden. About 10 -15 minutes. 


Wednesday, May 21, 2014

Blueberry Peach Cobbler


Summer is almost here which means fresh peaches will be in stores soon! I've always loved peaches- fresh, canned, frozen, you name it! In my recipe today I used a combination of drained canned peaches and frozen peaches and blueberry's. You can feel free to use any  combination of fresh, frozen, or canned fruit that you desire! I personally prefer to use a high side cast iron skillet for my cobbler, but feel free to use any oven safe vessel that you have.  I hope you give this recipe a try in the upcoming summer months. 

Ingredients:
1 C. Blueberries
1.5 LB. of sliced peaches
1 C. Water
1 C. White sugar
Zest of orange
Zest of Lemon
1 ts. cinnamon 

1 stick salted sweet cream butter
1/2 C. brown sugar, lightly packed
1 ts. vanilla extract
2/3 C. self raising flour
3/4 C. whole milk

Instructions:
1) Preheat oven to 350.  In a large saucepan, bring water, white sugar, zest, and cinnamon to a simmer. Add fruit and let simmer for about 10 minutes until syrup has slightly thickened. 
2) In a cast iron skillet or baking dish, place the stick of butter and put in oven until the butter has melted. 
3)In a separate bowl, mix together brown sugar, flour, milk, and vanilla extract. It is OK if there are a few small lumps from the brown sugar. 
4) Take the skillet/high side baking dish out of the oven when the butter is completely melted. 
5) Pour the batter over the butter. DO NOT MIX. It will look strange. The butter will be pooling around the sides and won't be incorporated. That is normal. 
6) Spoon fruit mixture and syrup over the top of the batter and butter.  DO NOT MIX. The batter will raise over the fruit during the baking process and your cobbler will be perfect. 
7) Place in the oven and bake for approximately 45 minutes. Your cobbler is done when you can stick a toothpick into the middle of the cobbler and no white batter sticks to the toothpick. Moist crumbs are OK. 

Cool for at least 5 minutes, and serve!
This is what my fruit&syrup mixture looked like while bringing it to a simmer. 

Fruit and syrup mixture after 10 minutes of simmering and cooling it.